Android Development Exercises: 100 Practical Challenges to Master Kotlin & Jetpack Compose
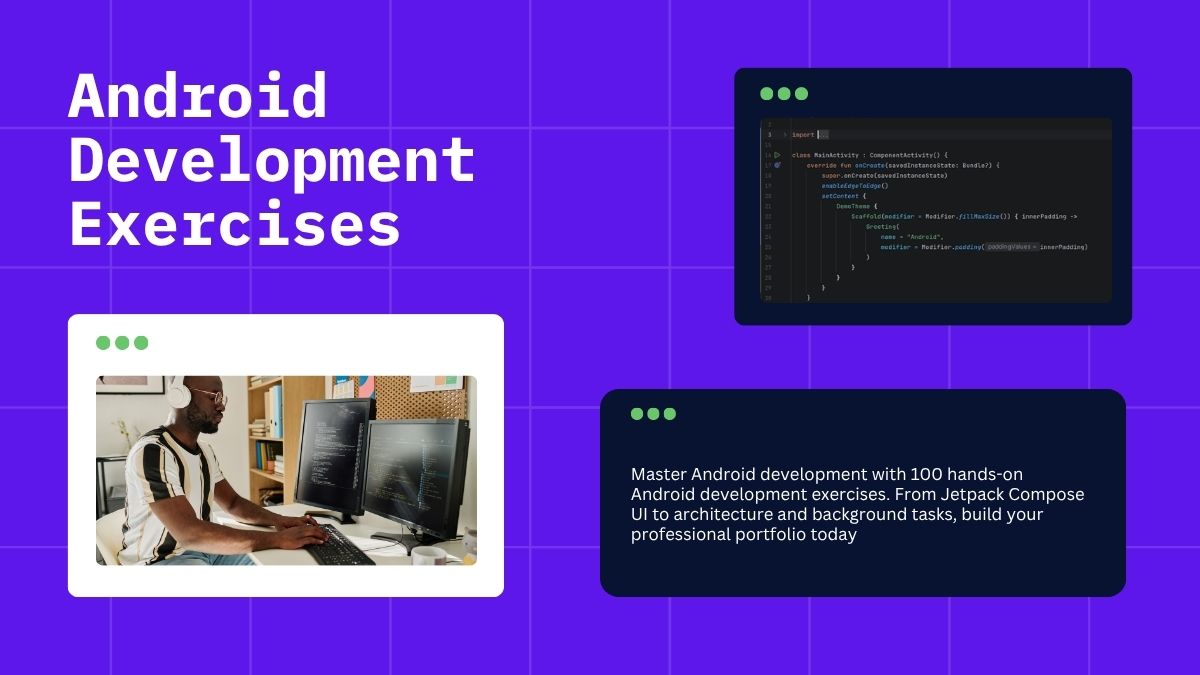
Table of Contents
Learning Kotlin syntax is actually pretty easy.
But there is a massive difference between reading Kotlin code…
And actually building a production-grade application from scratch.
If you are stuck in “tutorial hell”—watching endless videos on Jetpack Compose but freezing up the second you open an empty Android Studio project—you are not alone.
Most developers struggle with this exact transition.
Why? Because reading theory doesn’t build the muscle memory required to handle complex lifecycles, navigation, and API integration.
To truly master Android development, you don’t need another generic crash course. You need reps. Real, hands-on, problem-solving reps.
That is exactly why I put together this master list of Android development exercises.
Today, I am giving you 100 hand-picked practice problems designed to take you from absolute beginner to a seasoned Android engineer.
I have meticulously organized them into 10 phases of escalating difficulty. You will start with the fundamentals of modern UI design and code your way up to networking, local databases, background work, and architectural patterns.
By the time you finish problem #100?
You won’t just “understand” the concepts. You will have a GitHub portfolio of 100 features that prove you can code, debug, and scale professional-grade Android applications.
Ready to level up your development skills?
Let’s dive right in.
Phase 1: UI Fundamentals with Compose (Exercises 1-10)
Welcome to Phase 1. Forget the old days of XML and findViewById. We are building modern Android apps using Jetpack Compose, a declarative UI toolkit.
In Compose, the UI is a function of your state. These first 10 exercises are designed to get you comfortable with the “Compose mindset”—where you describe what your UI looks like rather than how to manipulate the view hierarchy.
1. The “Hello World” Composable
Create a simple screen that displays a “Hello, Android!” Text component centered on the screen using a Box.
- Why it matters: You’ll learn the basics of
SurfaceandTextcomponents and howBoxhandles layout alignment.
2. State Hoisting with Buttons
Create a counter app that increments a number when a button is clicked.
- Why it matters: This is the “Hello World” of state. You will learn
rememberandmutableStateOf, which are the foundation of how Compose tracks data changes to update the UI.
3. Column and Row Layouts
Build a simple profile card that uses a Column to stack elements vertically and a Row to align an icon and a label horizontally.
- Why it matters: These are your primary layout building blocks. You will learn how to use
arrangementandalignmentto space your components perfectly.
4. The Clickable Image
Display an image using an Image component that changes its alpha (transparency) when clicked.
- Why it matters: You’ll learn how to load resources from the
res/drawablefolder and use theclickablemodifier to handle user interaction.
5. Input Fields
Build a login screen with two OutlinedTextField components and a Button.
- Why it matters: You’ll understand how to handle text input states and why we use state hoisting to pass data up and actions down.
6. Responsive Layouts with Modifier
Build a grid of 4 boxes that behave differently based on their Modifier (padding, background, size).
- Why it matters: In Compose, modifiers are everything. You will learn how to chain them to control the look and feel of every UI component.
7. Scrollable Lists
Use a Column with verticalScroll to create a screen that scrolls when the content is too long.
- Why it matters: Beginners often forget that a
Columndoesn’t scroll by default. You’ll learn how to enable basic scrolling for small content sets.
8. Custom Theming
Define a custom Color and Typography scheme and apply it to a group of components.
- Why it matters: You’ll learn how the
MaterialThemeworks, ensuring your app stays consistent with modern design standards.
9. Scaffold and TopBar
Use the Scaffold component to add a TopAppBar and a FloatingActionButton (FAB) to your screen.
- Why it matters:
Scaffoldprovides the structure for a standard Android app. You’ll learn how to organize common UI elements correctly.
10. The Toggle Switch
Create a dark mode toggle that switches the background color of your main Surface.
- Why it matters: This ties it all together—state management, UI updates, and reacting to user input in real-time.
You have established the basics of the “visual” layer. Now that you can build static UIs, you’re ready to make them move and connect.
Phase 2: Navigation & Multi-Screen Apps (Exercises 11-20)
Apps aren’t just single screens. They are flows. To build a professional application, you must master how to transition between screens, pass data from one to another, and manage the “back stack” so users don’t get trapped.
In modern Android, we use the Navigation Component for Compose. This phase will take you from hardcoding screen switches to building dynamic, type-safe navigation graphs.
11. Basic Setup
Implement the NavHost and NavController to switch between a HomeScreen and a DetailScreen.
- Why it matters: This is the boilerplate that anchors every multi-screen app. You’ll learn how to define your navigation graph.
12. Simple Arguments
Pass a String (like a username) from the HomeScreen to the DetailScreen via the route.
- Why it matters: You’ll learn how to encode data into URLs and retrieve it on the destination screen.
13. Complex Data Objects
Pass a custom User data class between screens using Parcelable.
- Why it matters: Passing objects is more efficient than passing IDs and re-fetching data. You’ll learn how to use the
@Parcelizeplugin to make objects “transportable.”
14. Type-Safe Navigation
Use the modern Kotlin Serialization-based navigation to define routes as objects instead of raw strings.
- Why it matters: Strings are prone to typos. Type-safe routes prevent runtime crashes by catching navigation errors at compile-time.
15. Bottom Navigation Bar
Implement a BottomNavigation component that switches between three main sections of your app.
- Why it matters: This is a UI standard. You’ll learn how to keep the state of the selected tab and handle navigation events from the bar.
16. Deep Linking
Configure a route so that an external URL (e.g., myapp://detail/123) opens the DetailScreen directly.
- Why it matters: Deep linking is essential for push notifications and web integration. It allows the OS to navigate users into your app from outside.
17. Animated Transitions
Add custom entry and exit animations (like horizontal sliding) when navigating between screens.
- Why it matters: Polish matters. Animations provide visual cues that make your app feel responsive and fluid.
18. The “Login Flow” Pattern
Implement a splash screen that decides whether to navigate the user to the LoginScreen or HomeScreen based on an auth token.
- Why it matters: This teaches you how to perform conditional logic before the UI even renders, a common pattern in production apps.
19. Back Stack Manipulation
Use popUpTo to remove the LoginScreen from the history after the user successfully logs in.
- Why it matters: You don’t want a user to press “Back” and end up on a login screen they’ve already passed. You must learn to manage the navigation history.
20. Dialogs as Destinations
Use the navigation system to show a full-screen Dialog or bottom sheet as a destination.
- Why it matters: Not all transitions are full-page. You’ll learn how to treat UI modals as part of your navigation flow.
You now have the tools to link your app’s structure together. Navigation is the skeleton of your application, but it is currently empty.
Phase 3: Networking & API Integration (Exercises 21-30)
Your app is now a beautiful, multi-screen vessel—but it’s empty. In this phase, you will connect your app to the “real world.” You’ll learn how to fetch live data from APIs, parse JSON, and handle the asynchronous nature of web requests.
In Android development, Retrofit is the industry-standard library for network requests. We combine this with Kotlin Serialization (or Moshi) to map raw JSON data into your Kotlin objects.
21. Basic API Setup
Setup Retrofit with a public API (like JSONPlaceholder) and define an interface to fetch a list of “posts.”
- Why it matters: You will learn the boilerplate of creating a
Retrofitinstance, defining aBaseURL, and creating a service interface.
22. Data Modeling
Create a Kotlin data class that matches the JSON structure of an API response.
- Why it matters: This teaches you to use
@Serializable(or@Json) annotations to map incoming JSON keys to your Kotlin property names.
23. Coroutine Integration
Use the suspend keyword in your Retrofit interface to make network calls non-blocking.
- Why it matters: In the past, networking required callbacks. Now, you’ll learn how to write “linear-looking” code that suspends until the server responds.
24. The Error-Handling Wrapper
Create a sealed class NetworkResult<T> (Success, Error, Loading) to handle responses.
- Why it matters: APIs fail. You need a robust way to communicate “Network Timeout” or “404 Not Found” to your UI without crashing the app.
25. Image Loading
Use the Coil library to load and display images from a URL into an AsyncImage composable.
- Why it matters: Loading images involves complex caching and thread management. Coil handles this automatically for Compose apps.
26. Passing Query Parameters
Build a search screen that sends a query parameter to an API (e.g., ?search=kotlin) to filter results.
- Why it matters: You’ll learn how to build dynamic requests using Retrofit’s
@Queryannotation.
27. Handling Timeouts
Configure an OkHttpClient with custom timeouts for your network requests.
- Why it matters: A bad connection shouldn’t hang your app forever. You’ll learn how to force a “fail-fast” policy.
28. Logging Requests
Add an HttpLoggingInterceptor to see the raw JSON requests and responses in your Logcat.
- Why it matters: This is your primary debugging tool. You’ll learn to inspect the “wire” to see exactly what the server is sending back.
29. Headers & Authentication
Modify your Retrofit client to add an Authorization header to every outgoing request.
- Why it matters: Most production APIs require tokens. You’ll learn how to use Interceptors to inject these headers globally rather than in every single request.
30. The “Offline-First” Skeleton
Create a flow that first displays cached local data (if available) while simultaneously fetching fresh data from the network.
- Why it matters: This is the hallmark of a professional Android app. It ensures the user sees something immediately, even on a slow connection.
You now have a data-driven application! Your app can talk to servers, handle errors, and display images. But what happens when the user goes into a tunnel and loses internet?
Phase 4: Local Persistence & Databases (Exercises 31-40)
In a perfect world, the internet is always fast and reliable. In reality, users have spotty connections and limited data plans. An “offline-first” architecture is what separates a amateur app from a robust product.
In this phase, we use Room, Google’s official persistence library. Room provides an abstraction layer over SQLite, allowing you to fluently store and retrieve structured data while ensuring your app remains performant.
31. Setting up Room
Create a User entity, a Data Access Object (DAO), and a RoomDatabase instance to store local user data.
- Why it matters: You’ll learn how to define your data schema and the boilerplate required to open a database connection on the local device.
32. Inserting Data
Build a form that saves a new task to the database when the user clicks “Save.”
- Why it matters: You’ll learn how to perform non-blocking database writes using
suspendfunctions, ensuring the UI doesn’t freeze during disk I/O.
33. Querying with Flows
Use the DAO to return a Flow<List<Task>> so the UI automatically updates whenever the database changes.
- Why it matters: This is reactive programming at its best. You won’t need to manually refresh the list; Room detects the change and pushes the new data to your UI.
34. Filtering Queries
Write a SQL query in the DAO to filter tasks by a completion status (e.g., WHERE isCompleted = 0).
- Why it matters: You’ll learn how to write simple SQL queries inside Kotlin code to perform targeted data retrieval.
35. Deleting and Updating
Add functionality to swipe-to-delete a task and toggle a checkbox to update its completion status.
- Why it matters: Handling modifications correctly—ensuring the database state matches the UI state—is the core of maintaining data integrity.
36. Type Converters
Store a complex object (like a Date or a custom Enum) in a database column by creating a TypeConverter.
- Why it matters: SQLite only understands primitive types (Int, String, etc.). You’ll learn how to serialize/deserialize complex data so it fits in a database cell.
37. Database Migrations
Simulate a “database update” by adding a new column to your entity and writing a Migration script.
- Why it matters: Real apps change. If you push an update that changes the database schema without a migration, the app will crash for existing users. This is a critical skill for avoiding data loss.
38. Transactional Logic
Use @Transaction to perform multiple database operations (e.g., clearing a table and inserting fresh data) as a single “all or nothing” unit.
- Why it matters: Transactions prevent “partial failures” where a crash leaves your database in a corrupt, half-updated state.
39. In-Memory Databases for Testing
Create an in-memory version of your database to run fast, ephemeral unit tests.
- Why it matters: You don’t want to write to the physical disk during unit tests. You’ll learn how to mock the database to test your data logic in milliseconds.
40. The Sync Problem
Create a service that clears local storage and repopulates it from the API when the user triggers a “Manual Refresh.”
- Why it matters: This teaches you the complex logic of “Source of Truth”—when to trust the cache, when to trust the network, and how to handle collisions between the two.
You have now mastered the art of persistent storage. Your app can now survive reboots and network outages!
Phase 5: State Management & Architecture (Exercises 41-50)
At this stage, you’ve built functional components, but if you keep putting all your logic inside your UI files, your project will eventually turn into “spaghetti code”—impossible to test, hard to debug, and prone to breaking every time you change a single line.
In this phase, you will master the MVVM (Model-View-ViewModel) pattern. This is the industry standard for Android. It separates your app into three layers: the UI (what the user sees), the ViewModel (the “brain” that stores state), and the Repository (the “gatekeeper” that fetches data).
41. The ViewModel Foundation
Create a ViewModel that holds a StateFlow to manage the counter from Phase 1.
- Why it matters:
ViewModelsurvives configuration changes (like rotating the phone). You’ll learn why storing data in the UI class is a recipe for data loss and whyViewModelis the safe alternative.
42. State Hoisting
Refactor a screen so that the UI is “stateless”—it receives data via parameters and sends events via callbacks.
- Why it matters: Stateless UI is predictable. If a component doesn’t own its state, it becomes 100% reusable in any part of your app.
43. The Repository Pattern
Create a TaskRepository class that sits between your ViewModel and your Database/API.
- Why it matters: The ViewModel shouldn’t know where the data comes from. The Repository abstracts that logic. If you decide to switch from a database to a cloud store later, you only change the Repository—the rest of your app remains untouched.
44. LiveData vs. StateFlow
Convert an existing LiveData implementation to StateFlow.
- Why it matters: While
LiveDatais older,StateFlowis the modern, Kotlin-first approach. You’ll learn how to handle state updates in a way that respects coroutine scopes.
45. Exposing UI State
Create a UiState data class (e.g., data class HomeUiState(val isLoading: Boolean, val posts: List<Post>)) to represent the entire screen state.
- Why it matters: Instead of having five different variables for loading, error, and data, you have one single source of truth. This prevents inconsistent UI states.
46. Handling UI Events
Create a Channel or SharedFlow to handle “one-time events” like showing a Toast or navigating to a new screen.
- Why it matters: State and Events are different. You don’t want to re-show a “Login Successful” toast just because the screen rotated. You’ll learn how to separate state (persistent) from events (fleeting).
47. Dependency Injection (Hilt) – Setup
Configure Hilt in your project and inject a Repository into a ViewModel.
- Why it matters: Manually creating objects (e.g.,
val repo = Repository(api, db)) is painful and difficult to test. Hilt handles the “wiring” for you automatically.
48. Scoped Dependencies
Use @ActivityRetainedScoped to ensure your Repository lives as long as the ViewModel, not just the Activity.
- Why it matters: If your repository is recreated every time the screen rotates, you lose your cache. You’ll learn how to control the lifecycle of your injected objects.
49. ViewModels with Arguments
Use @HiltViewModel and SavedStateHandle to pass IDs or initial data into a ViewModel.
- Why it matters: You can’t just pass constructor arguments to a ViewModel manually.
SavedStateHandleis the safe way to inject data during the ViewModel’s initialization.
50. Testing the ViewModel
Write a unit test for your ViewModel using Turbine to verify that it emits the correct UiState when data is loaded.
- Why it matters: If your business logic lives in the ViewModel (and not the UI), you can test your app in milliseconds without ever launching an emulator.
You have now moved beyond “hacking together an app” and are officially designing software. Your code is now modular, testable, and scalable.
Phase 6: Advanced Coroutines (Exercises 51-60)
Even with a perfect MVVM architecture, your app will feel sluggish if you perform heavy tasks on the Main Thread. Android will throw an “Application Not Responding” (ANR) error if you try to perform network operations, file access, or complex JSON parsing on the thread responsible for rendering the UI.
In this phase, we master Structured Concurrency. You will learn how to move background work off the main thread, handle massive parallel operations, and ensure that no task “leaks” or keeps running when the user navigates away from your screen.
51. Moving off the Main Thread
Use withContext(Dispatchers.IO) within a suspend function to perform a file-read operation, ensuring the UI remains fluid.
- Why it matters: Beginners often try to move everything to the main thread. You’ll learn how to explicitly shift work to the appropriate
Dispatcher(IO for disk/network, Default for CPU-heavy tasks).
52. Coroutine Scope Life-Cycle
Implement a viewModelScope to launch a coroutine. Observe what happens to the job when the ViewModel is cleared.
- Why it matters: Coroutine leaks are a silent killer.
viewModelScopeautomatically cancels all work when the user leaves the screen, preventing crashes and memory leaks.
53. Parallel Requests (Async/Await)
Fetch data from two different API endpoints simultaneously using async and combine their results.
- Why it matters: Sequential calls are slow. You’ll learn how to execute tasks in parallel to reduce load times by up to 50%.
54. Exception Propagation
Demonstrate how a failure in one child coroutine can cancel its parent. Implement a CoroutineExceptionHandler to catch this globally.
- Why it matters: In structured concurrency, an error in one task can crash the entire group. You’ll learn how to isolate errors so one failed request doesn’t ruin the entire screen experience.
55. The supervisorScope
Use supervisorScope to run independent tasks where one failing shouldn’t cancel the others.
- Why it matters: This is crucial for dashboards. If the “weather” API fails, you still want your “news” feed to load.
supervisorScopegives you that independence.
56. Cancellation Cooperation
Create an infinite loop coroutine that checks isActive to ensure it stops immediately when the parent scope is cancelled.
- Why it matters: If your background tasks don’t check for cancellation, they will keep running in the background, wasting battery and memory.
57. Throttling Requests
Use a Job variable to cancel the previous search request whenever the user types a new character in the search bar.
- Why it matters: This prevents “race conditions” where an old search result overwrites a newer one. It’s the standard way to implement a performant search-as-you-type feature.
58. Retrying Logic
Write a custom retry operator for a suspend function that attempts to re-fetch data 3 times before finally failing.
- Why it matters: Networks are flaky. This teaches you how to add resilience to your data layer without frustrating the user with immediate errors.
59. Using yield()
Insert yield() into a long-running CPU calculation (e.g., sorting a massive list) to ensure the coroutine can be cancelled and allow other tasks to run.
- Why it matters:
yield()is a “cooperative” pause. It keeps your app responsive even during heavy computation.
60. Testing Coroutines
Write a unit test using runTest and TestDispatcher to verify that your coroutine-based functions execute correctly in a virtual time environment.
- Why it matters: Testing time-based async code is notoriously hard. You’ll learn to use
advanceTimeBy()to simulate delays and test your logic instantly.
You now possess the power to build incredibly responsive applications that handle concurrency without breaking a sweat. Your apps will be fast, fluid, and robust.
Phase 7: Lists, Grids, and Lazy Layouts (Exercises 61-70)
In Android, showing a list of 10 items is simple. But what about a list of 10,000 items? If you load them all at once, you will crash the app and drain the battery.
This is the “list problem.” We solve it using Lazy Layouts, which are “lazy” because they only render the items currently visible on the user’s screen. As the user scrolls, items are recycled and reused, keeping the memory footprint incredibly low.
61. LazyColumn Basics
Display a list of 1,000 strings using LazyColumn.
- Why it matters: You’ll learn the difference between a
Column(which renders everything at once) andLazyColumn(which only renders what is on screen).
62. Keys for Performance
Add a key parameter to your items in LazyColumn.
- Why it matters: Without keys, if an item is added to the top of your list, Compose might have to re-render every single visible row. Keys tell Compose exactly which item is which, allowing for highly optimized UI updates.
63. Sticky Headers
Implement a contacts list with sticky headers (e.g., “A”, “B”, “C”) that pin to the top as you scroll.
- Why it matters: Sticky headers are a UX staple. You’ll learn how to group data dynamically and use the
stickyHeaderfunction.
64. LazyVerticalGrid
Build a photo gallery app using LazyVerticalGrid to display items in a 3-column layout.
- Why it matters: Grids are essential for media-heavy apps. You’ll learn to define
GridCells.Adaptiveto make your grid responsive to different screen sizes.
65. Scroll State Detection
Detect when the user has scrolled to the bottom of a list to trigger a “Load More” (pagination) event.
- Why it matters: This is how you implement “Infinite Scrolling.” You’ll learn to use
LazyListStateto track scroll position and trigger data fetching at the right moment.
66. Item Animations
Add animateItemPlacement() to your list items so they slide smoothly when the list is reordered or filtered.
- Why it matters: List animations provide vital feedback. It tells the user where items went rather than having them just “pop” in or out of existence.
67. Multiple View Types
Build a chat feed where “Sent” messages and “Received” messages have different layouts within the same LazyColumn.
- Why it matters: Rarely are lists uniform. You will learn to use
itemanditemsblocks to interleave different composables in a single list structure.
68. Drag and Drop
Implement drag-and-drop reordering for a task list using LazyColumn.
- Why it matters: Interactivity is key to productivity apps. You’ll learn how to manipulate the underlying data model while the user is physically interacting with the UI.
69. Nested Scrolling
Place a LazyColumn inside a Column that also contains a header and footer.
- Why it matters: This is a classic “gotcha.” If you don’t configure nested scrolling correctly, your list will be cut off or unresponsive. You’ll learn how to use
nestedScrollmodifiers to handle complex touch interactions.
70. The Pagination Repository
Integrate Paging 3 library with your LazyColumn to handle large datasets from a network API automatically.
- Why it matters: This is the “Master Level” for lists.
Paging 3manages caching, network retries, and data loading automatically, ensuring your list is always silky smooth regardless of how much data you are loading.
You have successfully mastered the art of high-performance scrolling. You can now handle massive datasets with ease.
Phase 8: Media, Camera & Device Hardware (Exercises 71-80)
An app that lives only in the cloud is limited. To build a truly engaging mobile experience, you must learn to interact with the physical device. This phase moves you into the “native” layer, where you access the phone’s sensors, cameras, and media storage.
The core challenge here is Permissions. You cannot just take a photo; you must request the user’s permission, handle the “Denied” state, and manage the lifecycle of hardware resources that the OS may revoke at any time.
71. Runtime Permissions
Create a button that requests the CAMERA permission and handles the “Granted” vs. “Denied” outcomes.
- Why it matters: Android security is strict. If you don’t handle the permission state gracefully, your app will crash or, worse, become unusable.
72. Taking a Photo
Launch the system camera via an Intent, receive the result, and display the image in an Image component.
- Why it matters: You don’t need to build a camera from scratch. You’ll learn how to leverage the OS’s existing capabilities to save development time.
73. Media Picker
Use the PickVisualMedia contract to let users select a photo from their gallery.
- Why it matters: This is the modern, privacy-friendly way to access user files. You’ll learn how to handle URI-based data instead of raw file paths.
74. Audio Recording
Build a “Voice Memo” feature that records audio using the MediaRecorder API.
- Why it matters: Audio requires managing an active output stream. You’ll learn how to properly start and stop the recorder to avoid file corruption.
75. Playing Audio
Create an audio player that loads a local file and handles play, pause, and seek actions.
- Why it matters: You’ll learn about the
MediaPlayerlifecycle—specifically how to release resources when the user leaves the screen to avoid audio “leaks” in the background.
76. Location Sensing
Request coarse location and display the user’s current latitude and longitude on the screen.
- Why it matters: Location is a highly sensitive permission. You’ll learn how to use the FusedLocationProviderClient to get accurate data while respecting battery life.
77. Sensor Data (Accelerometer)
Display real-time X, Y, Z axis data from the phone’s accelerometer.
- Why it matters: Sensors trigger events at an incredibly high frequency. You’ll learn how to process this data without flooding your UI thread and causing lag.
78. Connectivity Status
Create a ConnectivityManager listener that notifies the user when they switch from Wi-Fi to Data (or lose connection entirely).
- Why it matters: Users hate it when apps stop working without explanation. Proactive UI feedback keeps the user experience smooth.
79. Share Intent
Implement a “Share” button that sends text or an image from your app to other installed apps (like WhatsApp or Gmail).
- Why it matters: This is how you integrate into the Android ecosystem. You’ll learn how to use
Intent.ACTION_SENDto communicate between apps.
80. Picture-in-Picture (PiP)
Configure an Activity to support Picture-in-Picture mode so a video can keep playing while the user browses other apps.
- Why it matters: PiP is the gold standard for media apps. It requires a specific configuration in your
AndroidManifestand careful lifecycle management.
You have now bridged the gap between your code and the physical hardware. You are effectively controlling the device itself.
Phase 9: Background Work & Notifications (Exercises 81-90)
Most apps should do work even when they aren’t on the screen—like syncing data, uploading logs, or showing reminders. However, modern Android is extremely aggressive about killing background processes to save battery. If you write background code the “old way,” the OS will simply terminate your app.
In this phase, you will master WorkManager and Notification Channels, the official APIs for reliable background execution and user communication.
81. The One-Time Work Request
Schedule a simple background task to run once using WorkManager.
- Why it matters:
WorkManageris the only way to guarantee that a task will run, even if the user force-closes the app or the device reboots.
82. Constraints
Schedule a task that only runs when the device is charging and connected to Wi-Fi.
- Why it matters: You’ll learn to be a “good citizen” of the device. Running network-heavy tasks on mobile data or low battery is a quick way to get your app uninstalled.
83. Periodic Work
Create a work request that runs once every 24 hours to clean up local cache files.
- Why it matters: Periodic tasks are essential for maintenance. You’ll learn the limitations (e.g., you cannot set a period shorter than 15 minutes) imposed by the OS.
84. Data Input and Output
Pass a Data object (input arguments) to your worker and return a result back to the UI.
- Why it matters: Workers are isolated from your UI. You must learn how to pass parameters safely using the
Databundle system.
85. Chaining Work
Create a chain: Task A (Download) -> Task B (Process) -> Task C (Upload).
- Why it matters: Complex apps rarely do one thing. You’ll learn how to build dependency chains where tasks only execute if the previous one succeeded.
86. Notification Channels
Create a custom NotificationChannel with “High Importance” and show a basic alert.
- Why it matters: Since Android 8.0, notifications must have a channel. If you don’t define one, your notification will simply vanish into the ether.
87. Notification Actions
Add “Reply” and “Dismiss” buttons to a notification that trigger actions in your app.
- Why it matters: This creates an “interactive” experience. You’ll learn how to map notification clicks to
PendingIntentobjects that wake up your app’s logic.
88. Progress Updates
Update the progress of a WorkRequest and observe it in your UI (e.g., a progress bar that updates as the worker runs).
- Why it matters: Users hate “frozen” apps. You will learn how to bridge the gap between background workers and the foreground UI for live feedback.
89. Handling Worker Failures
Use Result.retry() when a network error occurs within a worker.
- Why it matters:
WorkManagerhas a built-in exponential backoff policy. You’ll learn how to let the system intelligently retry failed tasks instead of writing manual loops.
90. Foreground Services
Implement a ForegroundService for a long-running task (like music playback) that displays a persistent notification.
- Why it matters: If your work is truly critical and time-sensitive, it needs to be in the “Foreground.” You’ll learn the strict requirements for keeping a service alive without being killed by the system.
You now have the power to create apps that provide value even when the user isn’t actively looking at them. You’ve conquered the background, the UI, the data, and the hardware.
Phase 10: The Senior Capstone (Exercises 91-100)
You have reached the summit. This final phase is not about learning new syntax—it is about System Design. You are no longer just writing features; you are architecting a sustainable, professional-grade product that handles data complexity, testing, and production-level constraints.
91. The Feature Module
Separate your Capstone into a feature:search and feature:details Gradle module.
- Why it matters: In large companies, you never work in a single “app” module. You will learn to manage dependencies between modules to reduce build times and enforce clear boundaries.
92. Custom UI Component Library
Build a reusable “Common UI” library containing your own branded buttons, input fields, and loading states.
- Why it matters: Consistency is key. You will learn to create a design system that prevents UI drift and makes the app look professional across every screen.
93. Dependency Injection (Hilt/Dagger) – Advanced
Inject a Map<String, Provider<Feature>> to dynamically provide different navigation destinations based on feature flags.
- Why it matters: This teaches you how to decouple your navigation logic, allowing you to turn features on/off remotely without changing the core codebase.
94. Unit Testing (TDD)
Write a ViewModel test that uses a mock Repository and verifies that specific UI states are reached when the network returns a 500 error.
- Why it matters: You cannot be a senior dev without testing. You’ll learn how to write tests before you write the code (Test Driven Development) to catch bugs before they ever reach the screen.
95. UI Testing (Espresso/Compose Test)
Write a test that mimics a user typing into a search box, waiting for a result, and clicking an item.
- Why it matters: You need to ensure your UI doesn’t break during refactoring. UI tests catch regressions that unit tests miss.
96. Memory Leak Detection
Integrate the LeakCanary library into your app and fix at least one memory leak.
- Why it matters: Memory leaks are the silent killers of apps. This teaches you how to identify and resolve issues where objects stay in memory long after they should have been destroyed.
97. Build Types & Flavors
Configure debug, staging, and release build flavors, each with its own API base URL and app icon.
- Why it matters: Real apps have different environments. You’ll learn how to switch between test and production servers without changing your source code.
98. Security: ProGuard/R8
Enable R8 shrinking and obfuscation, and add custom rules to prevent important API classes from being renamed.
- Why it matters: This shrinks your APK size and protects your intellectual property by making the code harder to reverse-engineer.
99. CI/CD Integration
Configure a GitHub Action to automatically run your Unit and UI tests whenever you push a commit to the main branch.
- Why it matters: “It works on my machine” is not good enough. You will learn how to automate quality control so that broken code never makes it into production.
100. The Portfolio Capstone Project
Combine everything: A modularized, Hilt-injected, offline-first application that fetches data from a real API, caches it in Room, uses Paging 3, includes full Unit/UI test coverage, and deploys via CI/CD.
- Why it matters: This is the project that gets you hired. It demonstrates that you don’t just know “Android”—you know how to manage the full lifecycle of professional software.
Conclusion: The Path Forward
You now have a 100-step blueprint that covers everything from simple button clicks to enterprise-grade system architecture.
The biggest mistake developers make is trying to do all of this at once. Do not attempt to build a massive project on day one. Focus on mastering the basics in Phase 1 and 2, and let your confidence grow as you move through the layers of complexity.
Your Final Call to Action:
Which of these phases do you feel is your biggest weakness right now?
Are you great at UI but nervous about Background Work (Phase 9)? Or perhaps your UIs are beautiful, but your Architecture (Phase 5) feels chaotic?
Drop a comment below and tell me your “Phase Challenge.” I’ll reply with a specific tip to help you break through that wall. Your journey to senior-level Android engineering starts with that first commit—so go open Android Studio and get to work!